Benefits of ATOS Blue Light Scanner versus a CMM Machine
Optical 3D metrology technology is becoming more and more popular
Optical metrology, including structured light scanners like ATOS, is quickly revolutionizing the manufacturing industry. Many of the leading companies in the aerospace and automotive industries rely heavily on optical metrology in order to verify parts. Structured light scanners have increasingly become faster, more accurate, and easier to use.
However, many smaller organizations and job shops still rely on the traditional CMM—coordinate measuring machine—to measure parts. For these types of organizations, investing in the ATOS blue light scanners may seem out of reach. Smaller companies often assume the expense is too high, and that the return on investment is too low. With ATOS solutions starting at $33,450 USD, this assumption couldn’t be further from the truth.
In this article, we’ll cover the basics about the traditional CMM, provide an introduction to the ATOS blue light scanners, and explain how transitioning to ATOS from a CMM can save your company time, money, and headaches!
What is a CMM?
A traditional CMM is a device that uses a probe to touch different points on a part in order to take measurements. The CMM uses XYZ coordinates to reference the object’s displacement in space. A bridge CMM, one of the most common, allows the probe to move along these three axes, and each axes has a sensor that monitor the location of the probe on that axis. The machine then reads the position of the probe as it touches programmed points on the object, and registers its location.
A bridge CMM has three parts: a frame that contains the three axes along which the probe travels, the probing system itself, and a data collection system, which usually consists of a machine controller, desktop computer and software.
After the CMM takes measurements, the software produces a spreadsheet with a list of these points and their deviation from the tolerances specified in the design of the object. This “point cloud” of numbers describes the object’s shape.
More technologically advanced CMMs function in a similar way, but with some key updates. For instance, today these machines can be handheld and portable. A portable CMM isn’t using just the three axes then, but the whole range of space around the object to take measurements. A trade-off for this type of CMM is that it requires a human operator, which introduces a greater potential for human error.
CMMs once dominated the metrology market, but as technological advances have been made in other methods they are becoming less common.
What is ATOS?
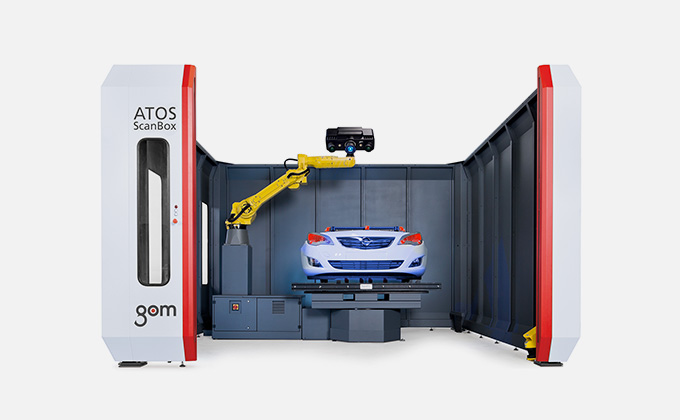
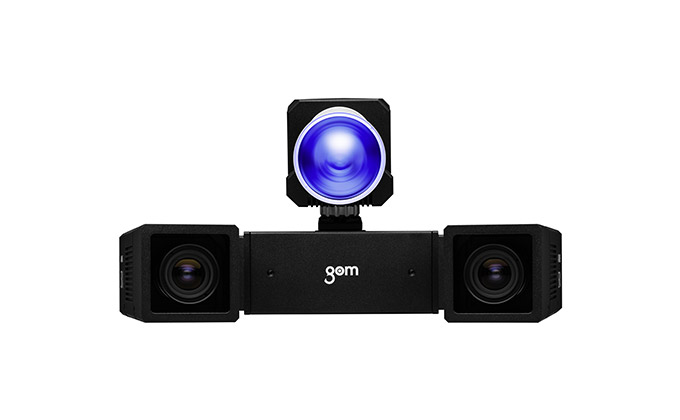
ATOS, Advanced Topometric Optical Sensor, is a structured blue light scanner that falls under the category of optical, non-contact metrology. Instead of using a touch probe to measure predetermined points on the object being measured, the ATOS scanner projects a fringe pattern of blue light across the part’s surface.
As the fringe patterns shift during each scan, the two cameras on either side of the projector capture the displacement of the XYZ coordinates to determine the position of the part and its measurements. By taking a full-field scan of the surface of the part, ATOS captures all areas within the given measuring volume and this allows ATOS to capture problematic areas that may not be captured with a traditional CMM.
ATOS produces a “point cloud” of measurements. When this point cloud is then compared to the CAD model (actual vs. nominal) within the software, it produces a 3D inspection color map that displays a spectrum of colors that signify areas in or out of tolerance. This visualization makes it easy for the operator to quickly determine which areas of the part are problematic without spending time deciphering a spreadsheet of numbers.
Compared to a CMM, ATOS blue light scanners require minimal setup and no specialized programming skills to operate. The scanners can also be integrated with automation solutions to further speed up the measurement process and throughput.
What are the benefits of adopting ATOS in place of a traditional CMM?
There are many benefits of adopting ATOS in place of a traditional CMM. One of the major advantages is that with ATOS, the entire part’s surface is captured. With a CMM, “if you don’t probe it, you don’t know it,” as one of our customers noted. The CMM is preprogrammed to capture certain areas on a part, but if there is a section of the part that falls outside of tolerances and that area isn’t included in the selected measurement points, no one will know that the part is faulty. With an ATOS scanner, the cameras pick up every area that is visible. This results in incredibly detailed, accurate data full of millions of XYZ points that is far beyond what a traditional CMM could capture in the same given time.
Another benefit of ATOS is the powerful software for comprehensive dimensional analysis – 3D inspection color maps, GD&T, trend/SPC, surface defect mapping, and a multitude of inspection features for industry specific engineering analysis (e.g. airfoil/turbine blades, sheet metal, plastics, castings, etc). Additionally, anyone can download the free GOM Inspect software to run analysis at any computer and to share the results between team members, customers, and/or suppliers…CMMs provide a spreadsheet of numbers, and it’s up to the individual operator to interpret those numbers. ATOS and GOM Inspect software automatically creates a 3D visualization of the part to make it easy to read and understand. The operator can tell exactly where the deviations on a part are just by a cursory look at the color map.
Because ATOS captures a full-field volumetric area, ATOS makes it easier to capture complex geometries. ATOS can capture deep holes, pockets, fine edges, and other features that are difficult to capture with a traditional CMM. Additionally, ATOS can be equipped with standard and customizable Touch Probes to measure discreet areas, holes, and cavities.
ATOS does not require any kind of specialized programming. CMM programming can be very time consuming and requires a special skill set. CMM programming can frequently cause a bottleneck in production because of the amount of time it takes to complete. With ATOS, the setup is simple and the sensor has self-monitoring calibration. Because of its ease-of-use, more employees can be trained to operate ATOS. Many customers cite time-savings as the main reason to switch from a CMM to ATOS.
One customer, a Production Manager at Chicago Mold, said, “It takes us two hours to measure and inspect electrodes to parabola tools with ATOS. Previously, with our CMM, it took 50 hours to measure each electrode, including setup and programming time. Instead of receiving a 20-30 page CMM report, we now receive instant inspection color plot results that are more easily understood and reduces the amount of time it takes to make required changes. Once the electrode is burned into the tool, it takes us ½ an hour to scan and inspect. With the CMM it took us 20 hours.”
In many cases, the combination of more accurate, comprehensive data and time-savings leads to money savings too. In manufacturing production, time is money, and producing a better quality part in less time allows companies to sell more products in a shorter time frame with less design rework. A Sr. CMM Technician at Mann + Hummel said the company used ATOS for first article inspection to aid a tool tuning process and went from 3-4 iterations of the tool down to just one. Each tool iteration was about $25,000 to implement. “One project alone justified the cost of the ATOS,” he said.
ATOS, when compared to a traditional CMM, captures more detailed, accurate data in a faster amount of time, with no specialized training or CMM programming skills needed, can capture complex parts and often results in significant time- and money-savings. Interested in learning how we can help you transition from a traditional CMM to ATOS? Contact us today to learn more!
Other optical 3D metrology systems
 |
 |
 |
 |
Bring quality, precision, speed and reliability to your production proccessAIE provides the total 3D metrology solutions from GOM to industrial customers and mechanical research institutes and universities in Vietnam. Contact us for free consultation today. |


