Forges de Courcelles: Multi-Part Measurement in Production
Site/Country: Nogent (52) / France
GOM systems: ATOS ScanBox 5120, ATOS II Triple Scan and ATOS Triple Scan 12M
GOM software: ATOS XL Professional VMR, GOM Inspect Professional VMR
Sector: Forging
Forges de Courcelles is a forging company based in the Haute-Marne department of the Grand-Est region in France. It is a specialist manufacturerof crankshafts for prestigious automotive brands. With its new automated optical 3D measuring cell – the ATOS ScanBox – the business has been able to improve its production processes by shortening inspection times and increasing the amount of data collected.
Forges de Courcelles is the second largest European manufacturer of crankshafts for well-known automotive brands and a leading forging company in France. It is part of Sifcor, a family-owned group, founded in the 1880s in Nogent which is located in the HauteMarne department (no. 52). Originally specializing in the manufacture of cutlery blanks, the group diversified in the 1950s into other business sectors such as the automotive industry. Today, the automotive sector is the group’s main market. Forges de Courcelles is a specialist manufacturer of steel parts for suspension systems, engines and transmissions. It uses semi-hot stamping and hot stamping steel processes combined with industrial presses and forging hammers.
Major clients include established French automotive brands like Renault and Peugeot and brands further afield such as BMW and Volkswagen. Today, the business has around 450 employees with a turnover of €150 million and sells over 65,000 tonnes of steel, 41% of which is via exports.
Forges de Courcelles: a leading hot forging French business in the automotive industry
Since the 1970s, Forges de Courcelles has been introducing industrial presses and induction heating methods to deliver on a mass production scale. The first presses weighing 6,300 tonnes were installed in the 1990s. In 2007, the business invested in its first 8,000-tonne press enabling it to supply to manufacturers based in Germany. A second press of the same weight was purchased in 2014 to help manufacture crankshafts at high speed.
Forges de Courcelles has always banked on innovation and development. This includes investment in new machines, production of new parts, robotization and automation of production lines, etc. Their zeal has led them to use robots, for example, to expand on the production of heavier part types and improve upon production lead times. The business knew it had to embrace technological change within its production machinery. As part of its innovative approach and continuous strive for improvement, the business grew an interest in optical 3D metrology and considered thesolutions offered by GOM.
A growing interest in optical 3D measurement
Cyril Schäfer has been the Methodology and Research and Development (R&D) Manager at Forges de Courcelles for 15 years. He was one of the leaders on the project to acquire a GOM measuring system along with Vincent Bouet who has worked at Forges de Courcelles for 17 years, 5 of which as Quality, Safety and Environment (QSE) Manager. The company began to gain an interest in optical 3D measuring systems about 10 years ago. It started talks with GOM during the initial stages of its R&D benchmarking analysis. At this point, Forges de Courcelles did not have any prior knowledge of 3D scanning and had only adopted conventional methods of coordinate measuring machines (CMM) using probes.
“We attended the Forges and Foundries Workshop organized by the GOM office based in Metz in 2016. We took a complex crankshaft with us that the ATOS Triple Scan was able to measure in just a few minutes when set to manual mode. This was when we started to consider using the ATOS Triple Scan in production control,” Cyril Schäfer told us.
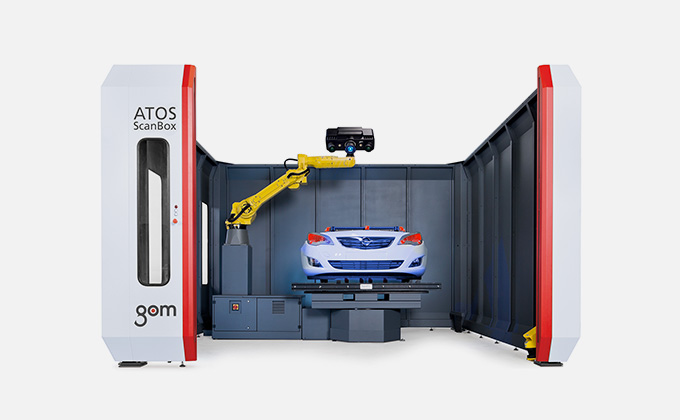
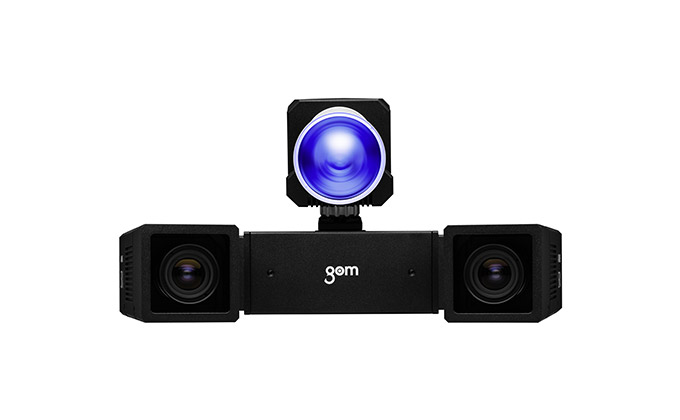
Assured by the GOM system demonstration carried out at this technical workshop, Cyril Schäfer and his colleagues initiated a demonstration and technical validation period of the ATOS ScanBox as an automated solution. In June 2018, the ATOS ScanBox 5120, fitted with the ATOS II Triple Scan sensor and the Plus12M module, was installed in the workshops at Forges de Courcelles.

Automated and accelerated inspection
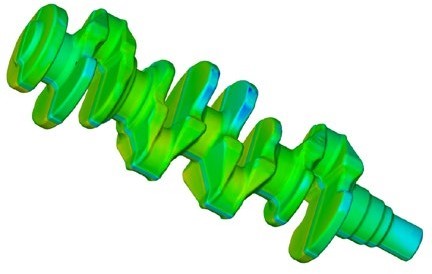
The ability to carry out inspections quickly was a key factor for Forges de Courcelles. Depending on the measuring points, a measurement taken with a CMM probe would usually take between 10 and 20 minutes per crankshaft. “We initially saw an opportunity to speed up inspection times. In addition, a CMM inspection only provides a limited amount of data, enough for the production control, but we could miss information on part geometry, particularly during the start-up stage,” said Vincent Bouet. Now, the full-field digitalized data allows us to continue the statistical process control of the production while at the same time providing the forge workers with a 3D view, in color, of the deviations and material deficiencies of the parts they are manufacturing. They are therefore able to detect variations that previously would have been missed. “So we are making the process faster and more intelligible for the workers!” explained Vincent Bouet.
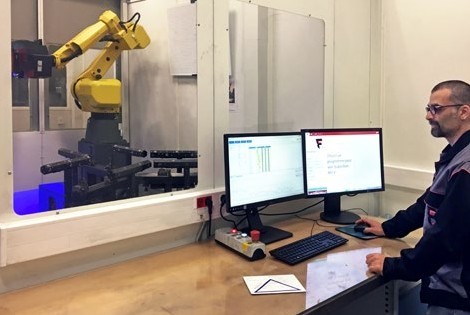
At Forges de Courcelles, the ATOS ScanBox is installed at three production stations in the crankshaft forging workshop. About 15 production workers regularly bring their parts to the production measurement laboratory. The Kiosk Interface makes it easier for them to begin inspecting a multiple-part assembly with four modes of operation enabling them to obtain 30 or more reference point markers.
“During the manufacturing process, production quality control is carried out on three parts. This is to guarantee
the geometrical compliance of the parts produced. The complete automation of our crankshaft production lines has greatly increased the production rate. Previously, three parts were measured in mass production using CMM methods. We had to load up the crankshaft, take the measurement, unload it and then redo the whole process twice over for the other two parts. This would take between 10 to 20 minutes per part. Thanks to the GOM setup and its quick measuring procedure and ability to inspect three parts simultaneously, we have improved our response times in case of issues with parts or deviations from the standard process. We now take 15 minutes to inspect three parts using the GOM system,” explained Cyril Schäfer.

Vincent Bouet added, “Also, as much as the objective to reduce the amount of time was important, so was the need to take reliable measurements. We confirmed with GOM in advance that their measurements were reliable and accurate by comparing them with our conventional measuring tools and methods – a key factor in guaranteeing the compliance of parts.“ In modern metrology, where processes are driven and regulated by measuring data, you need to be able to trust the data produced by the digitizer. Forges de Courcelles therefore worked closely with GOM to establish optimal settings that met the criteria for accuracy, resolution and speed of data acquisition.
“The main reason for choosing GOM for this application was because of the quality of the collected data and the speed of its acquisition in comparison with other well-known technologies such as 3D laser scanning,”
said Vincent Bouet.
The company also valued the opportunity to work in partnership with GOM to adapt the standard ATOS ScanBox 5120 solution to the specific application required by Forges de Courcelles. GOM helped the company to design a multiple-part assembly in proportion to the forging environment to ensure a high-performance level of metrology and particularly a compliance with ergonomics to maintain the safety of its employees.
The cell was adapted at the installation stage to allow for parts weighing up to 35 kg to be loaded on with a jib crane. The necessary safety and security measures were put in place to ensure the cell operated correctly. It really was a true collaboration between the teams at GOM and Forges de Courcelles, not just when installing the system but also during the training, familiarization and post-installation support.
A personalized Human Machine Interface (HMI) for autonomous users
Hervé Maupied, an employee at Forges de Courcelles for 32 years (27 of which as a metrologist) and Franck Dorlet also an employee at the company for 19 years (3 of which as a metrologist), are both user experts when it comes to GOM systems and software.
They use the GOM Inspect Professional VMR software when programming offline and for assessing measured data. The ATOS XL Professional VMR software is an essential part of the installed system. It processes the captured images and transforms them into meshes for the purposes of conducting the analysis. So that this solution is easy to follow, only the HMI, known as the Kiosk Interface, is made visible to the users. “GOM helped us to customize these modules and now we have autonomy over three systems,” explained the two metrologists.
New company prospects
The majority of Forges de Courcelles’ turnover originates from the automotive industry, an extremely competitive sector. Pricing pressures along with maintaining productivity in this sector have been significant and
ongoing for many years now. In Nogent, the business has grasped this and taken the necessary action to ensure it is continuously evolving. “Because of the 3D digitizer, the business is now able to measure 100% of its parts’ surfaces. This opens up new prospects for improving the product/process balance. Measured data is contributing to new confidential R&D projects,” said Cyril Schäfer.
“It is not only thanks to the installation support of the GOM teams and the increased efforts of the experts at Forges de Courcelles that this ambitious project was achieved. The army of in-house employees deserve credit too for their commitment to transforming this standard ‘plug and play’ single measuring machine into their very own figurative multi-functional pocket knife,” added Cyril Schäfer. This is not surprising given Nogent is the birthplace of French cutlery!
Forges de Courcelles
A family-owned business established in the 1880s, Forges de Courcelles is part of the Sifcor Group: a specialist manufacturer of forged automotive parts. It is the second largest European manufacturer of crankshafts for renowned automotive brands such as Renault, Peugeot and BMW. Based in the French department of Haute-Marne, the business currently has over 450 employees and exports its products worldwide. Regarded as the leading French forging company in the automotive industry, the business is continuously striving to improve and always looking to take an innovative approach.
Metrology Systems for Sheet Metal Forming
 |
 |
 |
 |
Bring quality, precision, speed and reliability to your production proccessAIE provides the total 3D metrology solutions from GOM to industrial customers and mechanical research institutes and universities in Vietnam. Contact us for free consultation today. |


