NASA Langley Research Center in Hampton, VA. has been instrumental in shaping aerospace history for more than eight decades. Established in 1917 as the first national civil aeronautics laboratory, NASA Langley has become a world-class center for aeronautics, earth science, space technology and structures and materials research.
The X-34 air-launched, hypersonic rocket plane is being developed for NASA’s Reusable Launch Vehicle (RLV) program. This low-cost testbed vehicle is designed specifically to demonstrate new operational approaches that will dramatically reduce the time, cost and number of personnel required to process and launch future reusable launch vehicles.
As part of the research process, NASA Langley Research Center have employed Rapid Fabrication Techniques to determine the aerodynamic principles of the designed X-34 model in a wind tunnel environment. As the fabricated model is scaled 1:400, any minor deviation in the fabricated model will result in drastic deviations on the actual full scale model.
With this issue in mind, NASA Langley Research Center consulted with Capture 3D, Incorporated to help determine how shrinkage in the Rapid Model Fabrication process effects distortion in the model. Capture 3D employed the ATOS 3D scanner to acquire measurements from the 1.25% scale model. In a matter of hours, Capture 3D was able to acquire millions of data points on the surface of the scaled model.
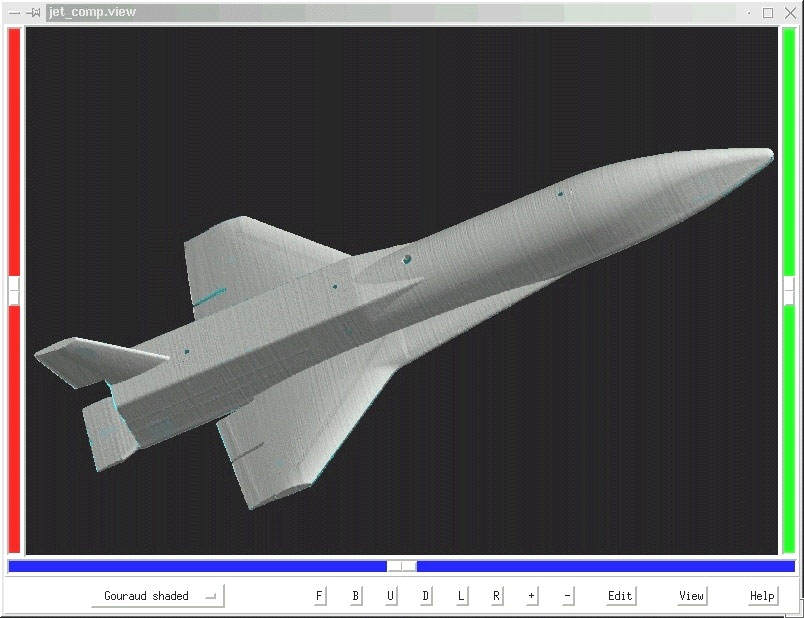
The resulting point cloud is displayed in fig. 1, the shaded version in fig. 2.


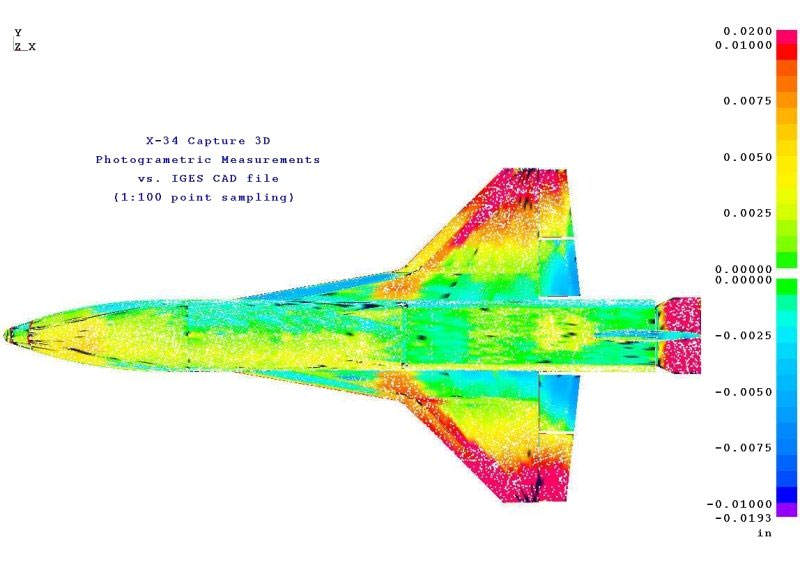
The resulting point cloud was then used for verification of the “as built” vs. “as designed”. The CAD model for a part is compared to the data acquired from the measurement of the part, or “point cloud” data. The software will graphically display the deviation between the original CAD design and the actual part as built.
The result from one view of this particular part is displayed in fig. 3.

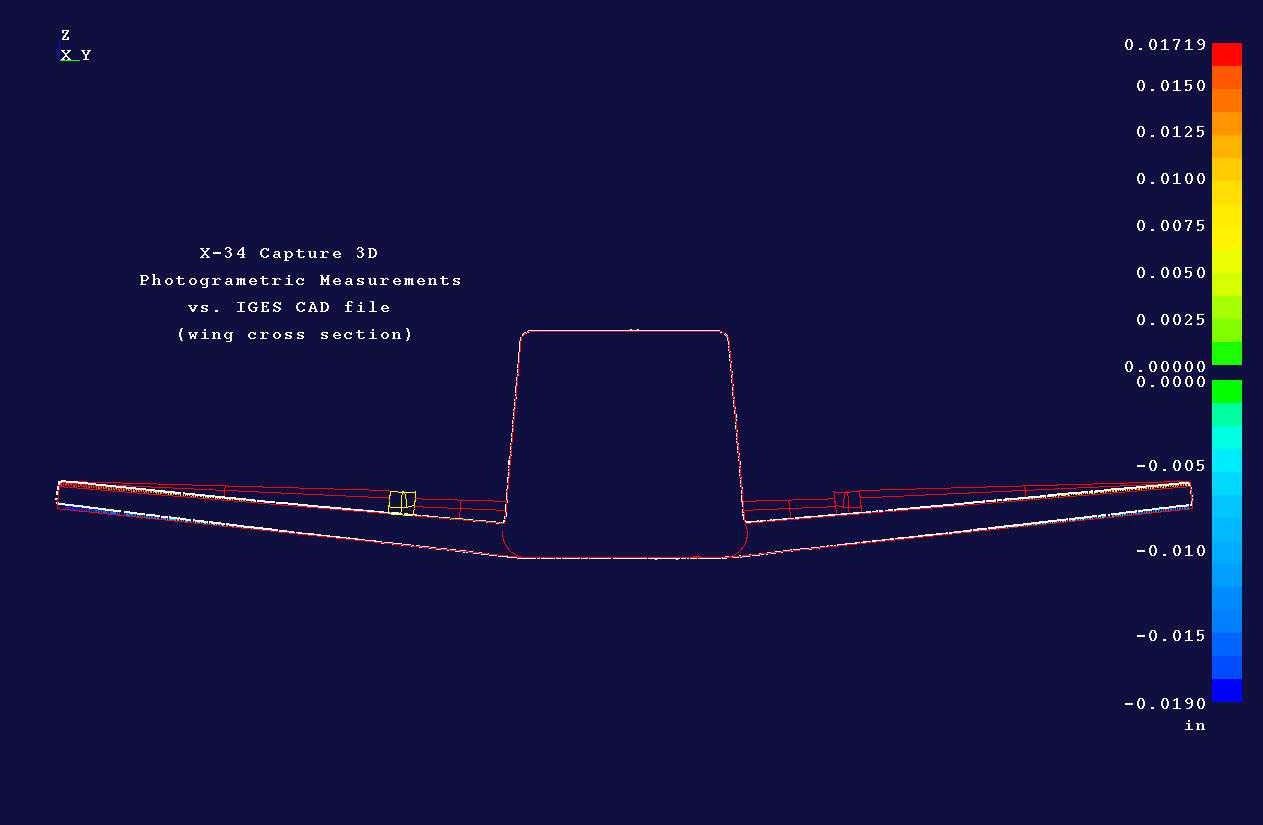
This plot indicates a deviation on the leading edges towards the wing tips of plus .01 inches and on the trailing edges of the wings of minus .0193 inches. The image displayed in fig. 4 shows a cross section cut through the wings and the fuselage of the X-34.
Fig. 4: Wing cross sectional analysis
The conclusion arrived from this project was that there was a curl in the leading edge and tail which were not linear dihedral. This pointed out the specific step in the Rapid Fabrication Process which is causing the models to warp. Since the time of this study, NASA has acquired an ATOS 3D scanner, bringing in-house the capability to perform their own three dimensional measuring and scanning.


