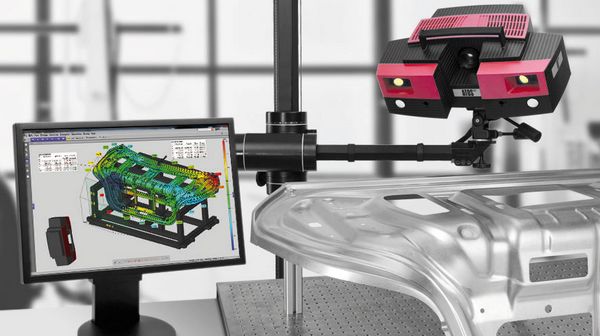
Companies strategically adopt cutting-edge solutions to help solidify their position within a competitive marketplace. Years ago, structured light (white/blue) 3D scanning technology was being implemented to help product development and alleviate coordinate measuring machine (CMM) bottlenecks. Today, this advanced non-contact technology is directly replacing CMMs and is being used throughout manufacturing- from design, adaptive machining, quality control to near-line and in-line production applications. In addition, it has evolved archaic workflows by transforming engineering tasks onto a completely digital platform. What used to take weeks, and sometimes months, now takes hours.

Blue light 3D scanning technology has become an integral asset within organizations. These solutions are helping reduce cycle times, quickly resolve problematic areas, and minimizing costs, thus speeding up the overall time to market while increasing profits.
- Immediately solve quality issues – Quickly derive the optimal corrective action.
- Lean manufacturing – Eliminate unnecessary repetitive processes, rework, and iterations.
- Process optimization – Improve cycle times, productivity, and/or capacity.
- Improve product quality – Tighter part quality standards.
- Cost avoidance – Resolve unforeseen issues to eliminate making bad parts.
- Faster time to market – Increase profits and improve competitive advantage.

How the Technology Works
Blue light 3D scanners, also known as structured light, white light, or optical 3D metrology systems, use a different technology than CMMs and 3D laser scanners.
CMMs are programmed to collect measurements where the probe touches the part’s surface. In many cases, the programming takes a long time, especially on complex geometries, thus creating a backlog. CMM data is limited to the programmed points, so locations that could possibly be suspect are overlooked, creating a long iterative process for engineers to decipher the proper corrective action.
Laser scanners use beams of colored light to collect surface geometry. These devices that are hand-held or mounted on an articulating arm requires the user to move it in paint-like strokes. This not only fatigues the user’s arm, but can cause issues in overlapping data especially on larger objects.
Structured light 3D scanners, typically mounted on a camera stand, tripod, or robot, work like point-and-shoot cameras and require little to no programming with minimal setup. The projector quickly displays a pattern onto the part’s surface and, as the pattern changes, the technology calculates X-Y-Z coordinate points of an object’s entire surface geometry. Intelligent algorithms automatically align each scan to create a complete digital 3D blueprint.
High quality blue light 3D scanners can rapidly acquire millions of accurate 3D data points per scan and interpret the results into meaningful visual feedback within the software to dramatically optimize processes. The net effect is significantly more surface area of the part gets measured very accurately and rapidly.
Real-World Applications
The US Army’s Aviation Missile Research,
Development, and Engineering Center has adopted blue light 3D scanners as a standard for its inspection, reverse engineering, and adaptive machining applications. On a single project, the center saved costs of up to $100 million dollars by providing computer models in a fraction of time from the generated 3D scan data. With the versatility to precisely measure small parts, such as avionics or missile subcomponents to a full-size aircraft, the AMRDEC metrology team turned future-thinking ideas into reality by changing traditional methods to improve processes within the aerospace and defense industry.
Pratt & Whitney, an early adopter of ATOS 3D scanning technology, spent significant time testing artifacts and comparing the results with traditional methods in order to prove out the process. Once ATOS was certified for their inspection applications, partner companies were also encouraged to implement the technology in order to help improve the overall supply chain network. Areas of implementation for Pratt & Whitney have included compressors, tooling, cases, turbine blades, IGT components, and nozzles. By automating its ATOS process, Pratt & Whitney further increased its productivity and throughput while ensuring process repeatability for verifying aerospace and turbine engine components.
Strategic Approach
In each of these examples of companies and organizations modernizing manufacturing with blue light 3D scanning technology, the secret for success is a combination of high quality technology with intelligent software and a streamlined strategy to ensure proper execution and implementation.
We all want to avoid “garbage in, garbage out,” so balancing accuracy and speed requirements is crucial. The best approach is to benchmark various technologies inside the actual manufacturing environment to achieve real-world results. Additionally, Gage R&R and correlation studies are performed to prove out the process. Lastly, a ROI analysis comparing the current method to the new method will give a quantitative justification for the process change. Although technology is the vehicle that helps modernize manufacturing, it is the people who are the visionary drivers.
Although technology is the vehicle that helps modernize manufacturing, it is the people who are the visionary drivers.


