Metalsa – a leading supplier to the automotive industry
In industrial manufacturing, automated measurement techniques ensure a higher throughput while at the same time keeping process reliability at a high level. For this reason, Metalsa opted for automated optical measuring systems.
Shorter product cycles paired with higher quantities result in an increasingly shorter project duration, especially in the automotive supply industry. Furthermore, the demand for high-quality sheet metal parts will continuously rise, as functionality and safety requirements concerning parts are also growing. To meet these market requirements, Metalsa – a leading supplier to the automotive industry – relies on an automated part inspection.
Located in Bergneustadt (Germany), the company manufactures in particular chassis modules, car body structures and safety systems. Among its customers, Metalsa has some renowned German automobile manufacturers such as Daimler, Volkswagen, BMW and Audi, but also international manufacturers such as Skoda, Volvo and Toyota. Since 2013, Metalsa has been using a turn-key plug-andplay measuring cell from GOM for standard quality control to meet customer demands on quality and high quantities. Due to the automation of the inspection of sheet metal parts, the company saves time and costs.
Founded in 1956, the company has been using the automated measuring cell particularly for series inspection, but also for toolmaking. At Metalsa, sheet metal parts such as front ends and B pillars or safety components like roll bars are measured optically and automatically. “The time saved in comparison to tactile measurements is a huge advantage”, explained measurement expert Marcus Girndt.
Shape and Dimension Analysis of Sheet Metal Parts
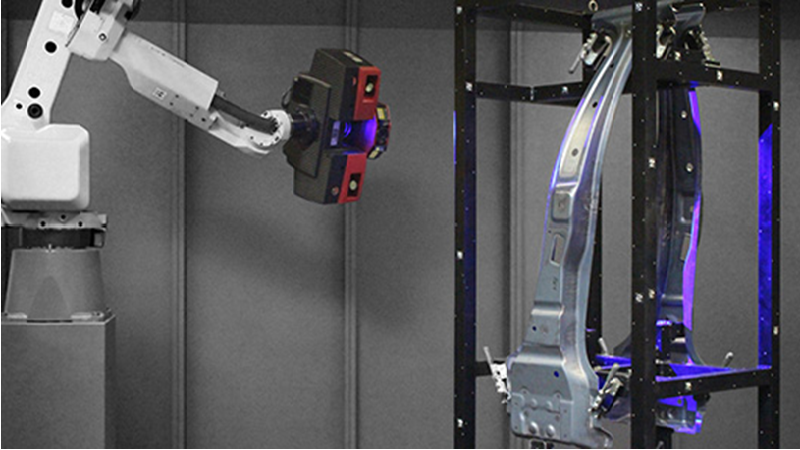
The quality control of pressed parts is based on a two-step process or rather on a three-step process as far as assemblies are concerned. After the hot-formed parts fall out of the press, Metalsa carries out a first full-field measurement with the ATOS ScanBox. “This step serves for controlling the shape and dimensions close to production”, explained the head of the quality engineering department. Even though the part is formed, it does not yet show any further features. These are obtained later during laser cutting.
“We measure the parts for the first time in series prior to cutting in order to ensure that parts that do not comply
with the required dimensions are not further processed”. The full-field measuring results are then compared against
the CAD data set. “The ATOS ScanBox does this automatically”, added Girndt. As a result, not only surface
deviations from CAD are derived but also GD&T data.
Once the measurement plan is saved as a template in the ATOS software, measurement and inspection run automatically. For this purpose, the fixtures for parts manufactured at Metalsa are provided with a barcode. By scanning this code with a barcode scanner, the measuring cell automatically starts executing the measuring procedure and inspection report. For the inspection of the surface, the part is virtually aligned. As bore holes and trimmed edges do not yet exist, the ATOS Professional software uses areas showing a distinctive shape as a reference.
Based on this reference, the part can be optimally aligned virtually. This allows a forming analysis prior to laser cutting. “Considering our quantities, tactile measuring techniques would not work at all”, stated Girndt. “For a form analysis of a B pillar, you would have to measure hundreds if not thousands of measuring points. This would result in an inspection report of 60 pages. Instead, we have now the visual evaluation, which shows all important results at a glance in form of a color plot. This way, we save two thirds of the time required.”
Automated Control of Hole Positions and Contour Cut

If the shape of the part lies within the tolerance, laser cutting is the next step at Metalsa. During laser cutting, the part is provided with characteristic features such as holes and a contour cut. Afterwards, a second measurement serves for controlling laser trimming.
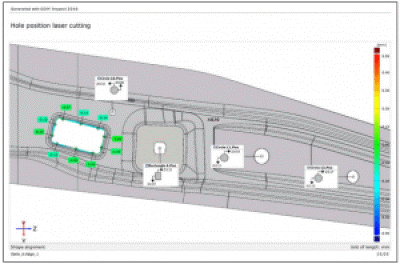
The hole position and trimming of holes as well as the entire outer contour of the part are checked with an
accuracy in tenths of a millimeter. Depending on the requirement, the evaluation is based on specific measuring points or is visualized in form of an image representation. Deviations to the CAD model are marked in color and are displayed as labels or in tables.
Assembly Analysis and Trend Identification
If the individual components comply with the given tolerances, the parts are either directly handed over to the customer or passed for further processing and assembly. The welded parts are also checked with the optical measuring machine.
Assembled components are controlled in view of surface points, trimming points as well as hole positions. “We mainly want to know if the part will still fit after assembly and if the dimensional accuracy remains unchanged”, explained Girndt. In addition, Metalsa uses the measuring machine for trend analyses. In this context, several measurements are compared for defining a value pattern. “We use this function, for example, during production of B pillars. Although these are manufactured in two different welding units, the pillars must have exactly the same shape.” By means of a trend analysis, the measurement engineers at Metalsa can quickly detect whether one of the units is exposed to wear, which could result in defective parts.
The Key Advantage: Easy Operation
Thanks to its easy and intuitive operation, the measuring machine at Metalsa can be operated even without prior metrological knowledge. It only takes half an hour to instruct employees, for example, from the production department to enable them to operate the system easily. “This is a major advantage considering that we producein continuous shifts requiring uninterrupted measurements in order to be able to ensure the high quantity”, explained the measuring expert. As all measured data sets are automatically saved, they can be reused and processed anytime for trend projects. “No matter which information we need for other projects, we do not have to span the part a second time, as we already have the data from all measurements.”
To sum up, according to the measurement expert one can point out three aspects showing that the measuring
system has proven a valuable investment regarding competition: high usability, significant reduction of measuring time and full-field results.
| AIE is a dedicated and professional partner in 3D solutions for customers in the manufacturing in Vietnam. With advanced technology solutions including 3D scanning, 3D printing, 3D inspection, 3D design and simulation software from leading brands in the world, we are committed to consulting and providing effective solutions that are suitable for actual needs of each business and help customers solve production challenges.
Contact us for a free consultation! |


