The future of metrology in vehicle construction
Measuring system: ATOS, GOM Inspect Professional
Keywords: Production-related robot inspection cell, press shop, automatic shape and dimension control, optical 3D metrology, inspection software, trim & spring, hole pattern.
Automated Robot Inspection Cell for Quality Control on Sheet Metal Components at BMW
The press shop at BMW‘s Dingolfing plant relies on optical metrology systems including automation and standardization for inspection of sheet metal components. Here, 3D coordinate measuring technology from GOM sets completely new standards, offering high time-saving potential since sensor, automation and inspection software all come from a single-source provider. The automation processes in particular, have been subjected to continuous development in close collaboration with BMW.
Customers place very stringent demands on models from BMW’s high-end 5, and 7 Series manufactured at the Dingolfing plant. In order to satisfy these requirements, BMW deploys state-of-the-art metrology as well as special manu- facturing standards. For example, when the current BMW 7 Series rolled out in 2008, the tactile measuring technology in use at the Dingolfing press shop until that time was largely replaced with optical metrology systems.
Proven suppliers for this new technology to BMW include GOM (Gesellschaft für Optische Messtechnik) from Braunschweig. Numerous systems from GOM in addition to those in the Dingolfing press shop have been in use at BMW plants since 2003, at all departments such as design, tool manufacture, press shop and car body construction.
Robot inspection cells: Shape and Dimension Control in Manufacturing
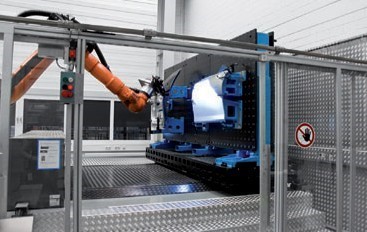
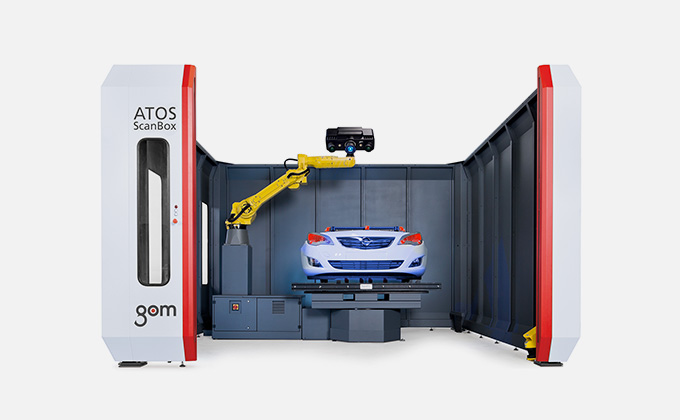
The inspection cell used in the Dingolfing press shop is a highly innovative GOM solution. The robotic automated metrology inspection cell is positioned along- side Europe’s biggest suction transfer sheet metal press. The 24 hour automated cell enables BMW to inspect sheet metal components of various sizes – from small lock plates to complete side panels (Fig. 1).

Six different components can be mounted at once in this process. A smart system for handling the mounting plans enables workers to complete assem- bly at speed. “The main advantage of the automated inspection cell is that it achieves higher throughput rates in industrial manufacturing – since a higher unit volume is handled in a shorter time and planning improves – as does reproducibility and, with it, process accuracy,” emphasizes Dr. Carsten Reich, head of GOM’s Automated Inspection Solutions team.
Optical 3D Metrology: time-saving, reliable, transparent
In the Dingolfing press shop, the automated inspection solution from GOM has already been used to support the launch of series production and manufacturing for over six vehicle types. The robot inspection cell is used during the product development process (PDP) as well as during production process (PP). This brings several advantages, including fast root cause analysis, targeted correction measures and also analysis of the impact correction have on adjacent areas.
This broad range of analysis options can be done without the need to take new measurements – all thanks to the full surface database that optical metrology supplies. Other valuable aspects are shorter component evaluation discussions and a clear overview of the results, with eventual divergences shown as a color chart. Another interesting aspect is the time-saving compared with tactile measuring technology: optical metrology collects more data in a shorter time.
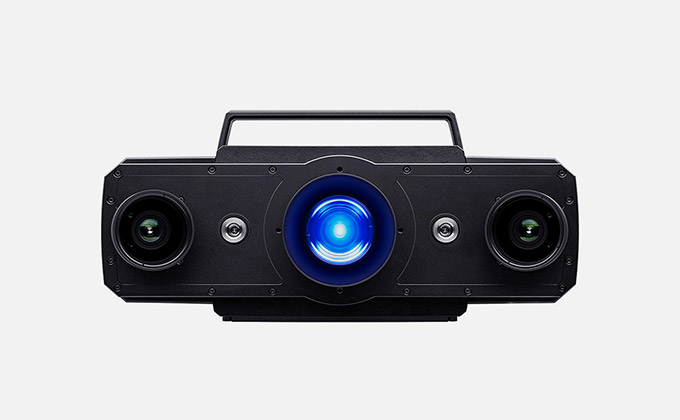
In addition optical metrology supplies full surface measurements instead of just probing a few single points like tactile a CMM. This means that components are fully inspected, leaving no areas of the component ‘blind’ or unchecked (Fig. 2).
 |
 |
| Fig. 2: The fringe projection process and stereo camera principle in optical metrology guarantee accurate and reliable component inspection. Full surface measurements enable complete component inspection and a clear view of results, thus saving time on compo- nent evaluation. |
Full surface measurement: flexible evaluation, clear inspection reports
There is also impressive benefit to be gained in series measurements. Using the optical metrology system leads to increased measurement capacity, independence of inspection plans and dispenses the need for program adjustments in case of component changes. This results in a significant improvement in component inspection throughput. Vital advantages are also reported for batch analysis measurements. With the full surface database allowing additional evaluations to be carried out whenever needed, component series can be analyzed right down to their original status. Components can therefore be inspected at any surface point independently of inspection plans, without the need to take new measurements. This helps to minimize time also for complex evaluations, thanks to tools like inspection sections.
With its integrated evaluation software, the inspection cell also offers various additional features that make workers’ lives much easier: For example, any deviations in measurement results are visualized as clear color plots rather than reams of 2D digits, one receives from tactile CMM. Thus, inspection reports that used to be several hundred pages long are now reduced to a single image. The- se color plots make it possible to ascertain any deviations from CAD at a glance: While green reflects the optimal state, the other colors – red, yellow and blue indicate deviations. This makes it possible to immediately identify components that are less than perfect as well as to quickly clarify where and why. It is also easy to import inspection plans for direct CAD data based measurement planning for inspection of features such as surface, trim & spring, hole pattern.
Consistent evaluation of 3D measurement data

Another positive aspect of all the GOM optical metrology systems in use at BMW is high transparency. Since the GOM 3D result viewer operates on hundreds of computers throughout the group and, in addition, resides on BMW’s internal network server – along with 28,000 completed metrology projects. This informa- tion can be accessed by all colleagues and departments involved, saving signi- ficant time in component evaluation discussions. This way 3D data are archived rather than storing the physical components. The collaborative relationship between BMW and the GOM automation team has proved highly successful – the Dingolfing workers certainly value the professional support they receive with sensor, automation and data evaluation from a single source partner (Fig. 3)
Virtual Measuring Room: Easy robot programming with software
Another major step set to bring even greater time-savings is rollout of the new software module, VMR – the Virtual Measuring Room – for offline teaching/pro- gramming. GOM’s Virtual Measuring Room makes it possible to design inspection cells virtually on the basis of real requirements such as available space and existing dimensions. Robot models and kinematics, sensor settings, components and attachments can be integrated in the software along with the CAD data and inspection plans. Each virtual inspection cell maps the functions of the real inspection environment and makes it possible to analyze space requirements, component positioning and accessibility. Thus, workers at the Dingolfing press shop will be able to save considerable time in future during the inspection of new components. The Virtual Measuring Room dispenses with the need for programming on robot control consoles, since robots are moved ‘offline’ in the software.
This innovative programming is supported with a concept known as ‘guided teaching’: the software gives operators immediate feedback on whether holes, slots, trim and spring, CAD surfaces, etc., are recorded correctly from a specific robot position. The synchronization of digital and physical aspects replaces the need for complex online robot teaching (Fig. 4).
 |
 |
| Fig. 4: Simulation in the VMR. The Virtual Measuring Room (VMR) guides users reliably through the entire measurement and inspection process. Much faster online/offline pro- gramming with innovative simulation tools slashes inspection startup times. The Virtual Measuring Room supports the integration of automated inspection cells for quality con- trol and standardizes analysis processes across departments and company locations. |
Industrial inspection solution
Inspection cells from GOM are innovative solutions that have been proven in manufacturing scenarios over many years, for example in production and process control and incoming goods inspection. Automated measuring con-
cepts enable shape and dimension inspections on full component surfaces, hole patterns and trim and spring in production environments, as well as permitting cause and process analysis without any operator input. With GOM’s Virtual Measuring Room inspection cells can also be reproduced and adjusted readily at different locations around the world.
The optical metrology system from GOM is used for quality assurance in the press shop, highly accurate measurements of sheet metal components and in car body assembly. Inspection processes at the Dingolfing press shop have been standardized and automated since the end of 2007, thereby saving a lot of valuable time. “Component deviations can be analyzed at speed, corrections in- tegrated in the elimination process without delay and components prototyped precisely during the product development process (PDP). This technology has already been introduced in Dingolfing for geometry assurance on car body components. Since the automotive industry sees optical metrology systems including automation and standardization as the future solution for evaluation of sheet metal components, other plants have already integrated this standard in their production processes,” Carsten Reich from GOM mbH sums up the situation.
Metrology Systems for Sheet Metal Forming
 |
 |
 |
 |
Bring quality, precision, speed and reliability to your production proccessAIE provides the total 3D metrology solutions from GOM to industrial customers and mechanical research institutes and universities in Vietnam. Contact us for free consultation today. |


